
Essential Tips for Building Durable Fences: Durable Fence Construction Tips
- artrailingtoronto
- Jan 30
- 4 min read
Building a fence that lasts is more than just putting up some wood or metal panels. It’s about planning, choosing the right materials, and using smart techniques. Whether you want privacy, security, or just a clear boundary, a durable fence will save you time and money in the long run. I’m here to share some essential tips that will help you build a fence that stands strong through all kinds of weather and wear.
Durable Fence Construction Tips You Can Rely On
When it comes to building a fence, durability is key. You want something that won’t need constant repairs or replacement. Here are some durable fence construction tips that I’ve found really helpful:
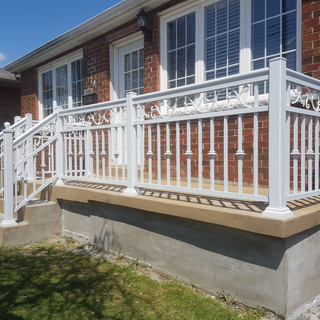
Choose the right materials: Wood, vinyl, metal, and composite all have their pros and cons. For example, cedar wood resists rot and insects better than pine. Vinyl fences don’t warp or rot but can crack in extreme cold. Metal fences like aluminum or steel offer great strength but may need rust protection.
Plan for drainage: Water pooling around fence posts can cause rot and weaken the structure. Make sure the ground slopes away from the fence line or add gravel at the base of posts to improve drainage.
Use quality fasteners: Don’t skimp on nails, screws, or brackets. Stainless steel or galvanized fasteners resist rust and hold better over time.
Seal and treat wood: If you’re using wood, apply a good sealant or stain to protect it from moisture and UV damage. Reapply every few years.
Space your posts properly: Posts that are too far apart can cause sagging panels. A good rule of thumb is to space posts 6 to 8 feet apart depending on the fence type.
These tips might seem simple, but they make a huge difference in how long your fence lasts. If you want to dive deeper, check out this fence construction tips resource for more detailed advice.

Should Fence Posts Be Set in Concrete or Not?
This is a question I get asked a lot. Setting fence posts in concrete is a common practice, but is it always the best choice? Let’s break it down.
Pros of setting posts in concrete:
Concrete anchors the post firmly, preventing movement.
It helps keep the post upright and stable, especially in windy areas.
Concrete can protect the post from soil moisture if done correctly.
Cons of setting posts in concrete:
Water can collect around the post if drainage isn’t good, leading to rot.
Concrete makes it harder to replace or adjust posts later.
It can trap moisture against wooden posts, causing decay.
If you decide to use concrete, make sure to:
Add gravel at the bottom of the hole for drainage.
Slope the concrete away from the post to shed water.
Use pressure-treated wood or metal posts to resist rot.
Alternatively, some people prefer compacting soil or gravel tightly around the post. This allows water to drain better and makes future repairs easier. The choice depends on your soil type, climate, and fence style.

How to Choose the Best Fence Material for Longevity
Picking the right material is one of the most important steps. Here’s a quick guide to help you decide:
Wood: Classic and natural-looking. Cedar and redwood are best for durability. Requires regular maintenance.
Vinyl: Low maintenance and weather-resistant. Doesn’t rot or need painting but can be brittle in cold weather.
Metal: Steel and aluminum are strong and long-lasting. Steel needs rust protection; aluminum is rust-proof but lighter.
Composite: Made from recycled wood and plastic. Looks like wood but lasts longer and needs less upkeep.
Think about your budget, style preference, and how much time you want to spend on maintenance. For example, if you want a natural look but don’t want to stain every year, composite might be a good choice.
Tips for Installing Fence Panels and Gates
Once your posts are set, the next step is attaching panels and gates. Here’s how to do it right:
Check for level and plumb: Use a level to make sure posts are straight before attaching panels.
Use strong hinges and latches: Gates get a lot of use, so invest in quality hardware.
Leave a small gap at the bottom: This prevents panels from dragging on the ground and allows for ground movement.
Secure panels firmly: Use screws instead of nails for better holding power.
Consider wind load: In windy areas, use diagonal bracing or heavier posts to prevent panels from blowing out.
Taking your time during installation pays off with a fence that stays solid and looks great.
Maintaining Your Fence for Long-Term Durability
Building a durable fence is just the start. Regular maintenance keeps it looking good and lasting longer. Here’s what I recommend:
Inspect your fence twice a year: Look for loose boards, rust spots, or signs of rot.
Clean your fence annually: Use a mild detergent and water to remove dirt and mildew.
Reapply sealant or paint: For wood fences, this protects against moisture and sun damage.
Tighten hardware: Screws and bolts can loosen over time.
Trim plants and grass: Keep vegetation away from the fence to prevent moisture buildup and damage.
A little upkeep goes a long way in preserving your investment.
Building a fence that lasts doesn’t have to be complicated. By following these durable fence construction tips, you can create a strong, attractive barrier that stands the test of time. Whether you’re enclosing a yard or securing a business property, these practical steps will help you get the job done right.
If you want expert help or professional installation, EZ Fences is ready to assist with reliable fence, railing, and post hole services in Barrie and surrounding areas. Let’s build something that lasts!


Comments